Cardboard Bird Ornaments – Happy Hooligans


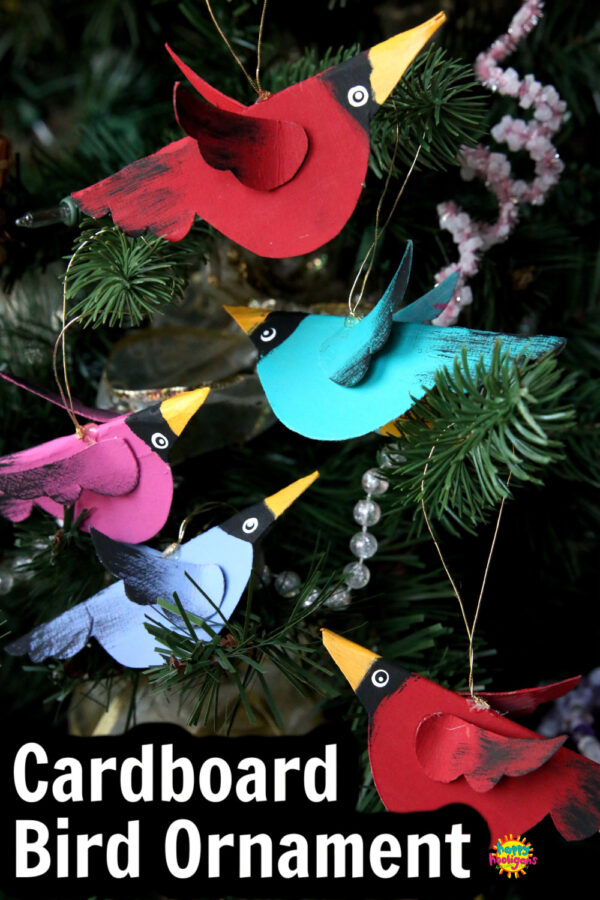
These cardboard bird ornaments are fun and easy for kids and adults to make; all you need is a cereal box, glue and some paint. Your colourful handmade birds can be used as gift toppers or Christmas ornaments, or you can string them into a mobile, and enjoy them all year long. The link to the printable template for the bird is included in this post.
See all of our bird crafts (for toddlers through tweens) here.
I made these colourful cardboardl bird ornaments last Christmas, but I’m just getting around to sharing them now. I’m so excited to finally show you how cute they are, and how easy they are to make.
They were inspired by a metal bird ornament that my brother gave me years ago. You can see it in the photo below. It’s the one with the metal hanger and the black curly-Q on its head.
That little red, metal bird has always been a favourite of mine, and last year, I realized just how easy it would be to replicate the ornament with a piece of folded cardboard.
Young children will enjoy making this simple winter bird ornament.
Quick, easy and cute
I used a cardboard cereal box because the weight and thickness of the cardboard were perfect. I tested one out by sketching the shape of the bird on cardboard. Then I cut it out, painted it, and glued on a couple of wings. I added a thread for hanging, and voila! It couldn’t have been any easier.
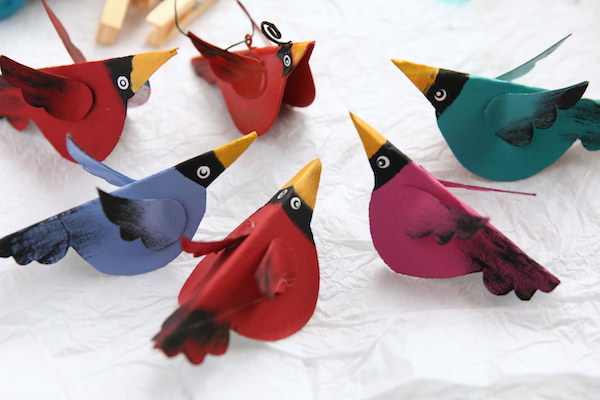
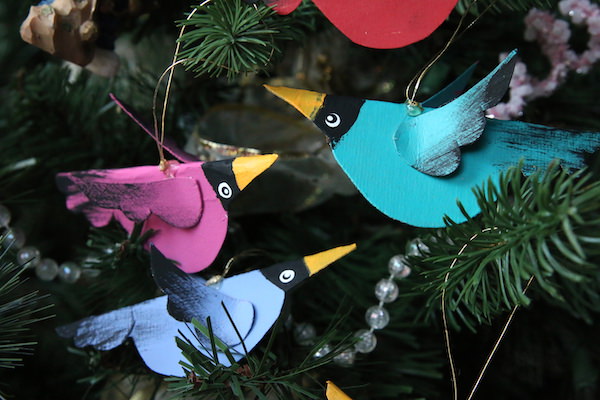
I was so delighted with how simple the first bird was to make, and how beautiful it turned out, that I ended up making a bunch of them in a variety of colours.
Display them all year round
I loved the way these birds looked hanging on my Christmas tree, and didn’t want to pack them away when Christmas was over, so I painted a small branch white and displayed the birds on it for a few more months.
Supplies:
For your conviencience, this post contains affiliate links. As an Amazon associate, I earn from qualifying purchases.
Instructions:
Time needed: 1 hour
- Print Template.
Print the template and cut out the bird’s body and the two wings
- Trace and cut out bird’s body.
Fold a piece of cardboard in half and press to make the fold neat.
Place the bird’s body on the cardboard with the top of the bird lined up along the fold.
Trace the bird’s body and cut through the two layers of cardboard to cut it out. Do not cut along the fold.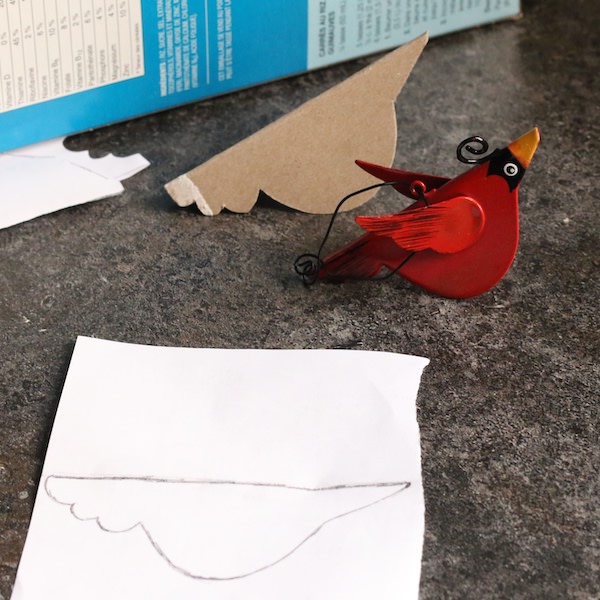
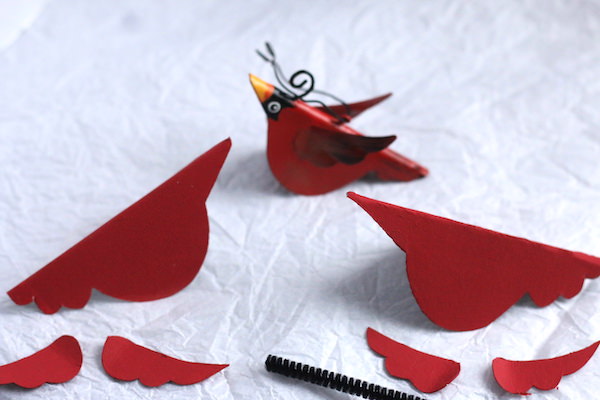
- Trace and cut out wings.
Place the 2 wing pieces on a single layer of cardboard and cut them out.
- Paint the body and wings.
Paint your birds body and wings in whatever colour you want, and let dry.
- Add details.
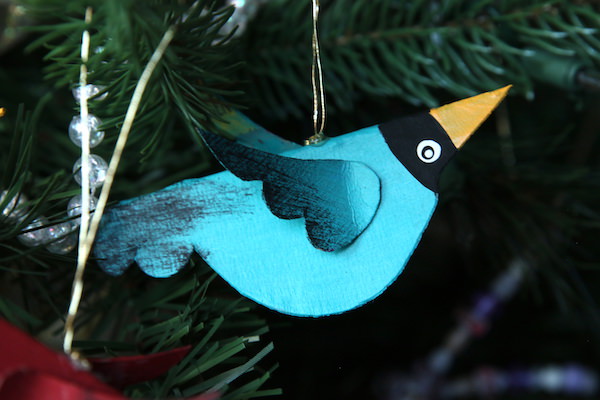
Dry brush a little black paint onto the tail and the tips of the wings. Paint a small section of black just before the bird’s beak, and then paint the break yellow. (see image below) Allow to dry.
Dot the eyes on by dipping the handle end of a paintbrush in paint.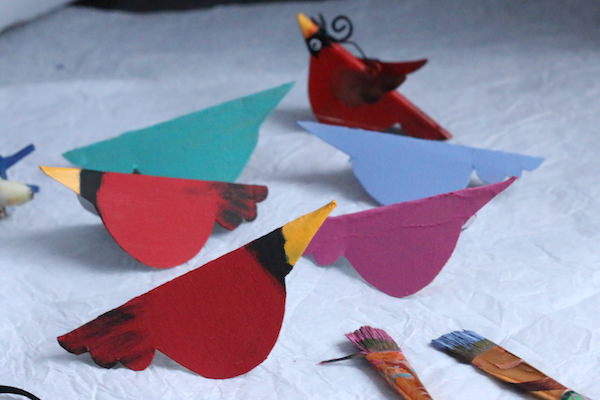
- Attach wings.
With a glue gun, attach the wings to either side of the birds body
- Attach a thread for hanging.
Cut a length of metallic thread and knot the ends together. Squeeze a dot of hot glue on to the back of the bird and press the knot into the glue (use your pencil for this so you don’t burn your fingers.
- Varnish ornament.
If you’d like to add a little sheen to your ornament brush a layer of craft varnish/sealer all over the bird.
- Hang it!
Hang your ornament on your Christmas tree or on a decorative branch.
I hope you enjoy making these colourful birds as much as I did. Who ever would’ve thought that such a simple craft could produce such beautiful results.
Related Posts:
Cardboard Vintage Ornaments
Cardboard Gnome Ornament
Cardboard Sugar Cookie Ornaments

Jackie is a mom, wife, home daycare provider, and the creative spirit behind Happy Hooligans. She specializes in kids’ crafts and activities, easy recipes, and parenting. She began blogging in 2011, and today, Happy Hooligans inspires more than 2 million parents, caregivers and Early Years Professionals all over the globe.


