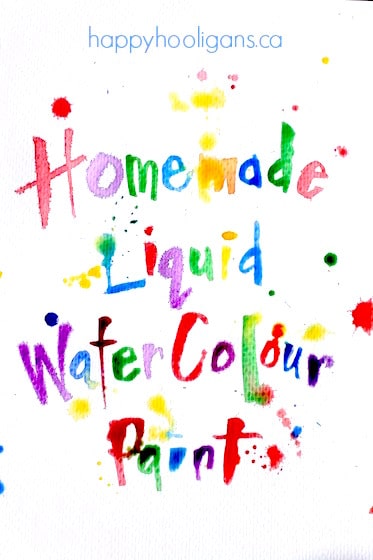
Vibrant Homemade Liquid Watercolours From Dried Out Markers

Learn how to make LIQUID WATERCOLOUR PAINT WITH your dried up markers. It’s fun and easy and can save you a fortune if you have kids who love to paint.
We love making our own paint here in my daycare. It’s a great way to save money, and making the paint is always a fun activity in itself. I’m thrilled to share this homemade liquid watercolour recipe with you today. All you need are old, dried out markers to make it.
Liquid watercolours are amazing. We use them a lot here in my home daycare. They’re vibrant, versatile, beautiful, and fun to use.
Liquid watercolours are also expensive to buy – especially when you use them frequently in a daycare or classroom for art projects and colourful science activities.
Good news… I’ve discovered a way to make your own homemade liquid watercolours which are perfect for preschool arts and crafts.
Lots of ink left in them!
You know those markers that the kids have left the tops off of, or that they’ve used so often there’s no ink left in them, or the ones that have just dried up over time?
Surprise… There’s actually a lot of ink left in them.
Even the most worn-out, dried up, marker has a ton of ink left in it. And you can easily extract that ink and turn it into colourful paint for your kids.
Easy but it takes time
The process is easy. It does take a bit of time though, so patience is required, but hey, those markers were just going in the trash anyway, right? Waiting a few days while your markers turn into paint isn’t really a biggie.
Let me show you how to do it!
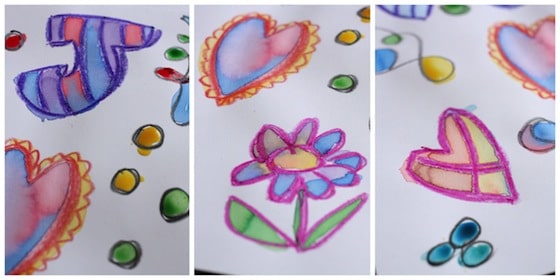
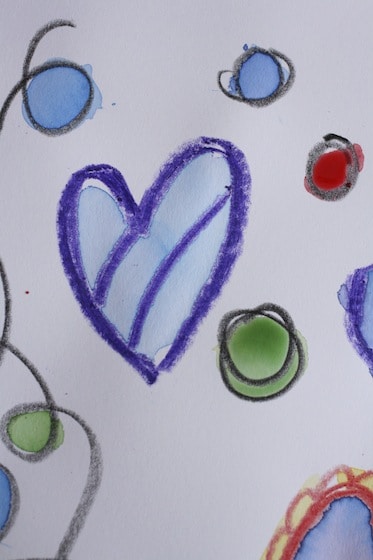
In these above pictures, the outlining was done in crayon. All other colour is the liquid watercolors.
Note: Because I like the intensity of store-bought Liquid Watercolor Paint (affiliate link, I put some extra effort into this process. You don’t have to put quite as much effort in, but I feel that it really paid off, and it’s why our paints are so vibrant. More on that in a minute.
Supplies:
- dried out markers
- water
- glass jars with lids (large baby food jars or small mason jars are great)
and if you’re putting in the extra effort:
- small bowl
- fork
- scissors or pliers
How to Make Homemade Liquid Watercolours:
First, your kids need to test all of the markers to see which ones are getting low on ink. We use this opportunity to do this fun little art activity.
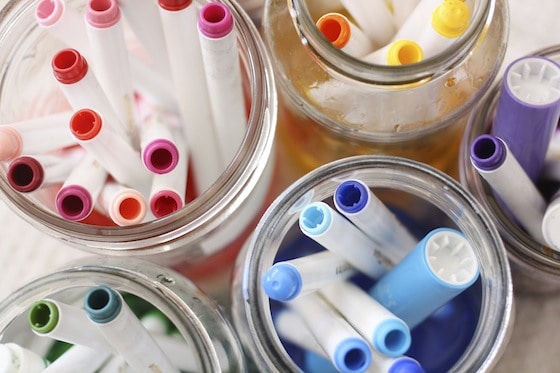
Then we set aside the good ones and sorted the dry markers into groups of similar colours. We ended up with 6 piles:
- red/pink/burgundy
- orange/yellow/peach
- green/teal
- blue/turqoise
- purple/lavendar
- brown/black/grey
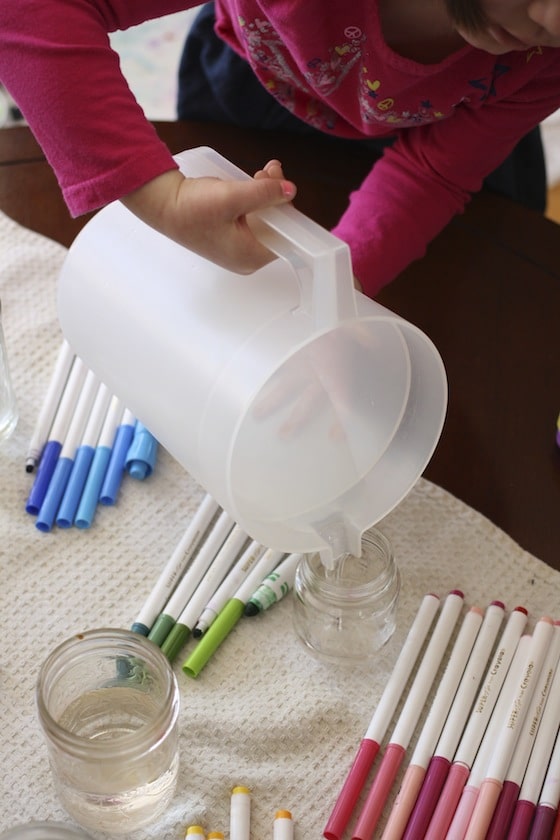
I set out six glass jars, and the four year old poured a bit of water into each jar.
Next, the hooligans placed the markers, tips down, into the water.
Immediately, colour started to leach out into the water.
We shook and stirred our jars a bit to observe the changes in the water, and then I set the jars on a window sill, and we left them for a full week.
What if some of the water evaporates?
It will happen. Don’t sweat it! Some water will evaporate, but your pigment won’t.
Your colours will simply become more concentrated, and that’s a good thing.
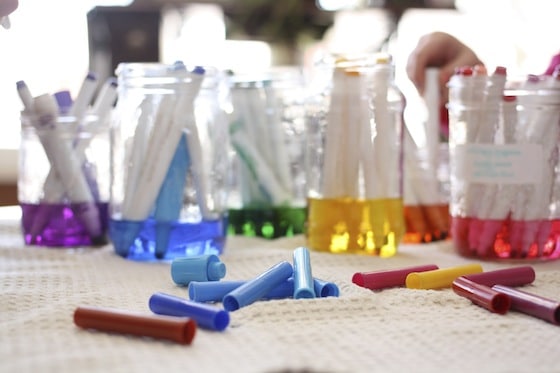
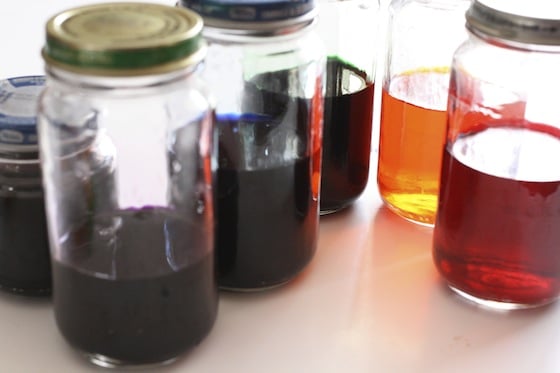
Our water became so dark as the days passed. Turns out there was quite a lot of ink left in those markers after all!
At this point, if you want, you can call it a day, and use your paint as is. This is where the extra effort comes in if you want to get eve more ink out of the markers.
To make our watercolours even more intense:
This next bit can get a little messy, so place everything in the sink, and work from there, or, if you’re working on a countertop or table, place everything on an old towel.
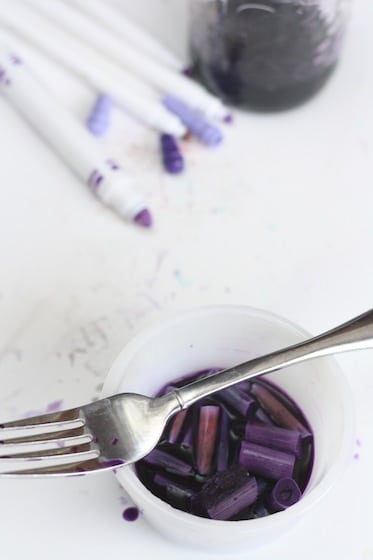
With a pair of pliers, I pulled the ends off the markers and removed the coloured inserts. Some of the inserts slipped out easily when I tipped the marker upside down, but others weren’t so co-operative, so I used the pliers to crack the plastic casing, and tug the insert out.
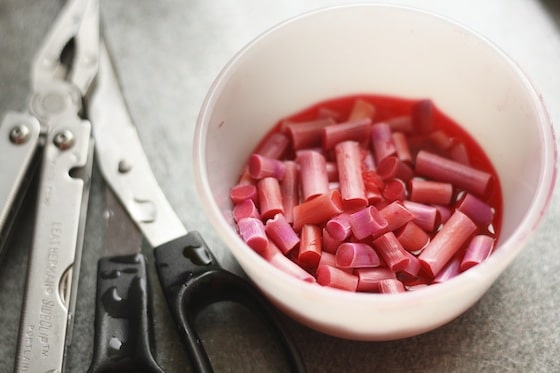
Then I snipped up the sponge inserts, and put them in a bowl with a bit of water.
With a fork, I squished the insert pieces until I had extracted all the colour I could, and I poured it into the matching jar.
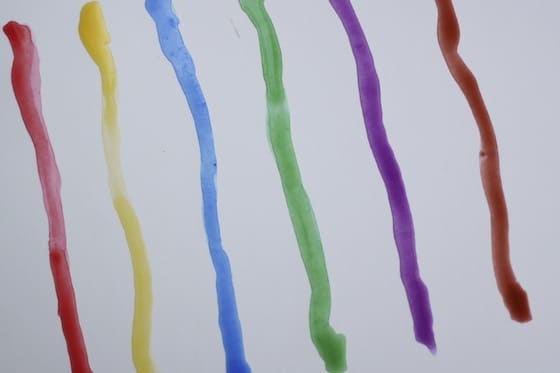
This was the result of my efforts:
The liquid paint colours are so intense that I have to hold some of them up to the light to tell them apart.
How to use your liquid watercolor paints:
You can use your paints full-strength or you can pour a small amount into an ice cube tray dilute with a few drops of water.
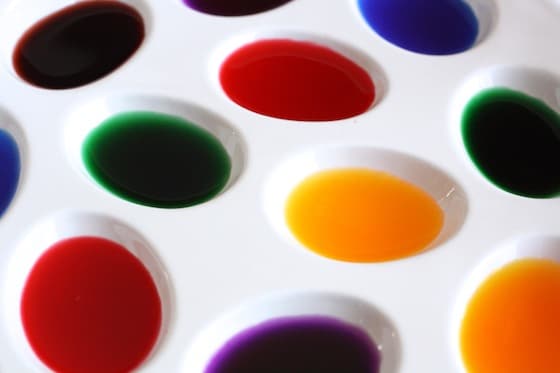
The ones you see below have been diluted.
Preserving your leftover paint:
If, at the end of their painting session, you kids have paint left in the tray DON’T throw it out! Leave the tray out in the open, and let the liquid evaporate. The pigment will dry in the bottom of the tray. When you’re ready to paint again, simply add a few drops of water, and stir to re-constitute your paint!
Storing your homemade liquid watercolour paints:
Store your homemade liquid watercolours in air tight containers. I store ours in baby food jars with the lids screwed on securely.
And there you have it. Gorgeous, homemade liquid watercolours for all of your creative art!
And they didn’t cost you a dime.
Check out some of the projects we’ve done with liquid watercolour paints here, here, here and here.
Boredom Busters for Kids!
Print off our checklist of 100 Fun Things for Kids to Do at Home. Stick it on your fridge, and they’ll never be bored again!
More Homemade Paint Recipes:
Follow the Hooligans on Facebook

Jackie is a mom, wife, home daycare provider, and the creative spirit behind Happy Hooligans. She specializes in kids’ crafts and activities, easy recipes, and parenting. She began blogging in 2011, and today, Happy Hooligans inspires more than 2 million parents, caregivers and Early Years Professionals all over the globe.


