Homemade Bookmarks – Tie Dyed with Sharpies and Alcohol

Make gorgeous Sharpie tie dye bookmarks with this easy Sharpie and rubbing alcohol technique. The result is a beautiful, handmade gift that kids can give to a parent, grandparent, teacher or neighbour.
Do your kids love making art with Sharpie Markers? Well, grab the Sharpies and rubbing alcohol! We’re making homemade bookmarks for Mother’s Day, using one of our all-time favourite art techniques. It’s easy and fascinating, and the results are simply gorgeous! If your kids love easy science activities, they’ll want to try this one for sure.
Have you heard of the Sharpie Tie Dye Technique? It’s a fun, easy and fascinating art process used create the look of tie dye with sharpies and rubbing alcohol.
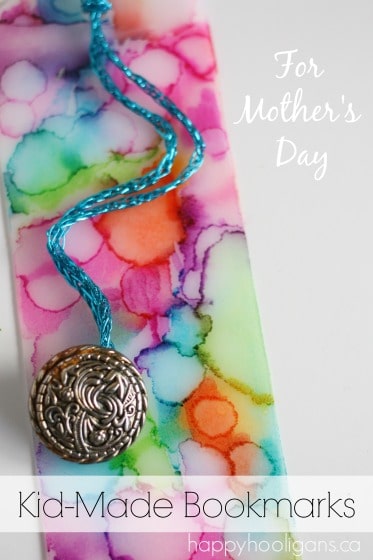
With Mother’s Day just around the corner, the hooligans have been working on some simple Mother’s Day crafts here in my home daycare and we decided to give the Sharpie Tie Dye thing a try to make bookmarks for the kids to give to their moms this Sunday.
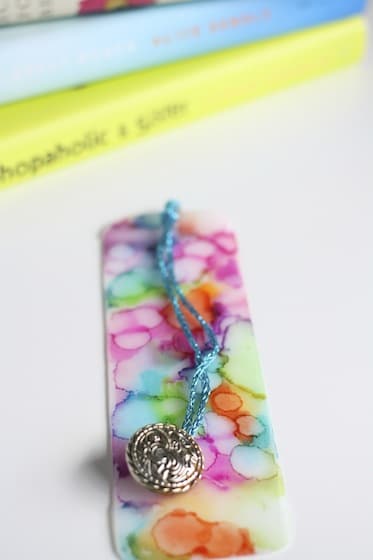
The results were gorgeous! We made bookmarks unlike any we’ve ever made before. There’s no way these will be stashed in a drawer like so many other kid-made gifts. They’re so pretty, you’ll want to show them off!
P.S. You may also like 20+ Creative Sharpie Art and Craft Projects
How does the Sharpie and rubbing alcohol technique work?
When you colour with Sharpie markers and then drip rubbing alcohol on to the ink, something very cool happens. You create an awesome tie-dye effect. Steve Spangler can tell you why Sharpie ink dissolves in rubbing alcohol.
A lot of people colour tee-shirts this way, but I wanted to know if we could create the same effect on a plastic surface, so I experimented with an empty vinegar bottle.
It worked! I was so excited with the results! There’s not a whole lot you can make out of a vinegar container, but bookmarks came to mind.
Let me show you how we made them.
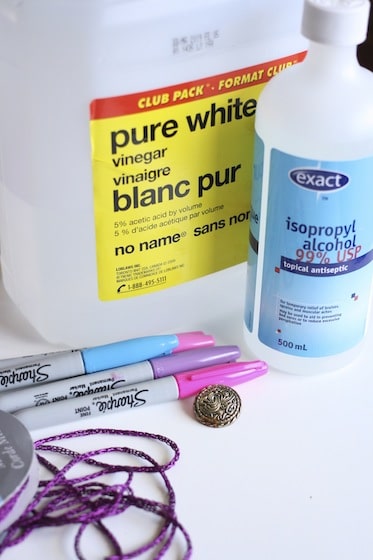
To make our Sharpie Tie Dye Bookmarks, you’ll need:
For your convenience, this post contains affiliate links. When you shop through these links, I receive a small commission from any purchases you make.
Supplies & Tools:
Cut out your bookmark:
To remove the label from the vinegar jug, I filled the jug with very hot water, and let it sit for 10 minutes. The heat from the water softened the glue, and the label was easy to peel off.
To make our bookmarks, I traced one of my own, store-bought bookmarks on the plastic with a pencil, and I used a pair of kitchen shears to cut it out. I managed to get 4 bookmarks out of one vinegar jug.
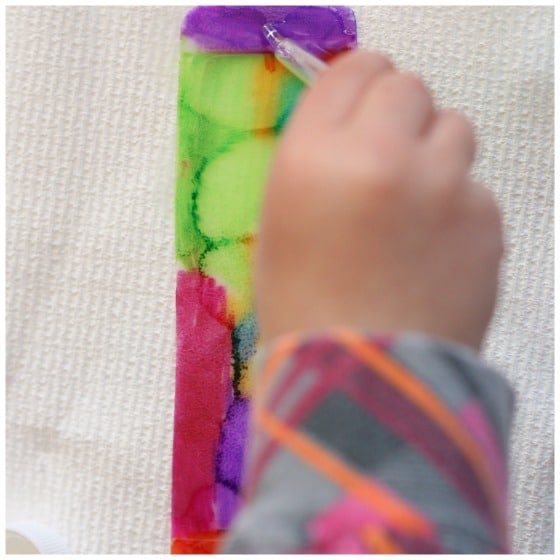
Colour your bookmark:
Next, we coloured our bookmarks. Using a variety of bright colours, cover your entire bookmark with your Sharpies. There’s no right or wrong way to do this. Just fill in the whole bookmark with blocks of colour.

Now for the magic!
The Sharpie and rubbing alcohol tie-dye technique:
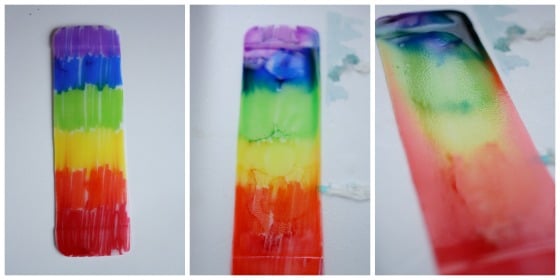
Fill a dropper/pipette with rubbing alcohol, and drip small drops on to your bookmark. You can tap your dropper against your bookmark – that will deposit tiny amounts of alcohol on to the plastic, or you can just drip the alcohol randomly over the ink.
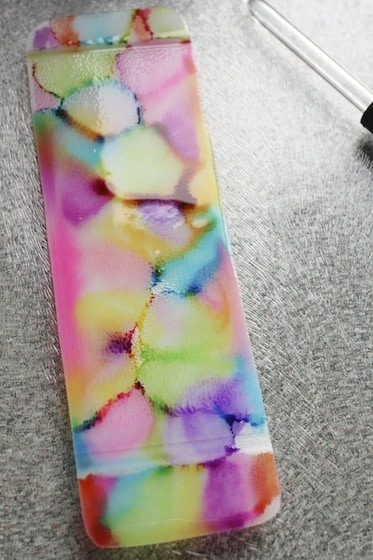
Then let it your project sit. Do not tilt your bookmark or the colours will all run together. Just observe, and you’ll see the colours blend and fuse together. It’s so magical and beautiful.
You can experiment with the amount of alcohol you use. If you’re not happy with the way things are going, you can wipe the bookmark clean with a paper towel, and start again.
Isn’t it amazing? I love watching this process!
Let your bookmark dry completely. It doesn’t take too long because the alcohol evaporates fairly quickly.
Setting the colour:
To prevent your Sharpie tie-dye from rubbing off, you’ll need to give it a shot of spray varnish. Do not brush on a liquid varnish as it will dissolve your artwork.
When spraying the varnish, spritz lightly and quickly. If you apply too much, the Sharpie ink will be activated, and your design will begin bleeding together again.
Allow your varnish to dry, and spray with a second coat if you like.
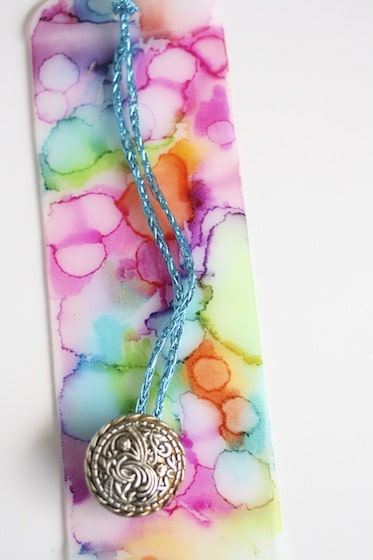
Once your varnish has dried, punch a hole in the top of your bookmark, thread a ribbon or some cording through, and embellish with a pretty button or a few decorative beads.
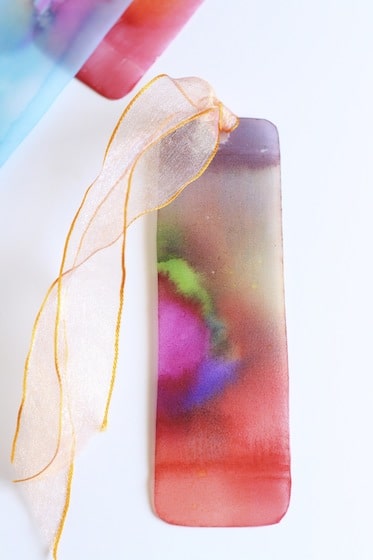
What do you think? A beautiful Sharpie tie dyed bookmark, perfect for Mother’s day.
If you’d like to try this process on a shirt, head on over to Mama Pea Pod, and check out their Sharpie-dyed tees!
Have a wonderful Mother’s Day!
You may also like:
Get 3-5 Playful Preschool e-Book!
25+preschool activities by 25 bloggers, 10 printables, 50 links to activities not featured in the book all for $8.99!
Download your copy today:

Follow the Hooligans on Facebook!

Jackie is a mom, wife, home daycare provider, and the creative spirit behind Happy Hooligans. She specializes in kids’ crafts and activities, easy recipes, and parenting. She began blogging in 2011, and today, Happy Hooligans inspires more than 2 million parents, caregivers and Early Years Professionals all over the globe.


