How to Wrap a Small Gift in a Pull-Tab Can
How to wrap a small gift in a pull-tab can: A creative way to wrap cash, gift cards, jewellery and concert tickets so no-one can guess what’s inside. Great way to wrap small gifts that are hard to wrap or disguise.
You know how it goes. You have a great gift to give someone – maybe tickets to a concert or the theatre, or a gift card to their favourite store, or perhaps a nice, crisp hundred dollar bill! You’re super-excited about your gift, but you don’t want to just stick it a boring, old envelope. You want your wrap-job to be special, and you don’t want the person to be able to guess what’s inside.
Well, I’m going to show you how you can wrap a small gift in such a creative way that they’ll never guess what’s inside. It’s also super-fun to open a gift wrapped this way. All you need is a pull-tab can from your pantry cupboard!
This is such a cool way to wrap a gift and a really fun way to receive one. I wrap a few small presents this way every Christmas and my kids think opening the gift is just as exciting as finding out what’s inside.
Preparing the can for wrapping only takes a few minutes, and it’s really easy to do. Let me show you how!
How to wrap a small gift in a pull-tab can:
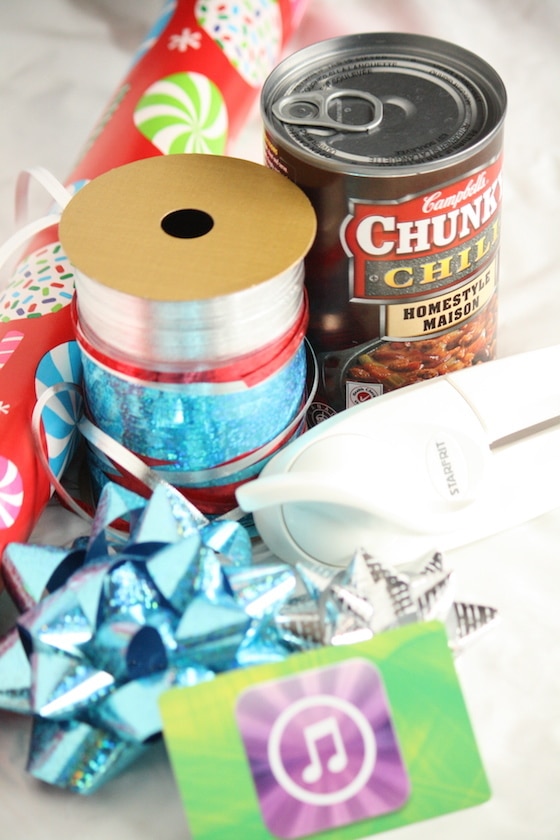
Supplies:
- Pull-pull tab can
- can opener
- hot water/dish soap
- hot glue gun
- wrapping paper, ribbons, bow
- tissue paper
- your gift
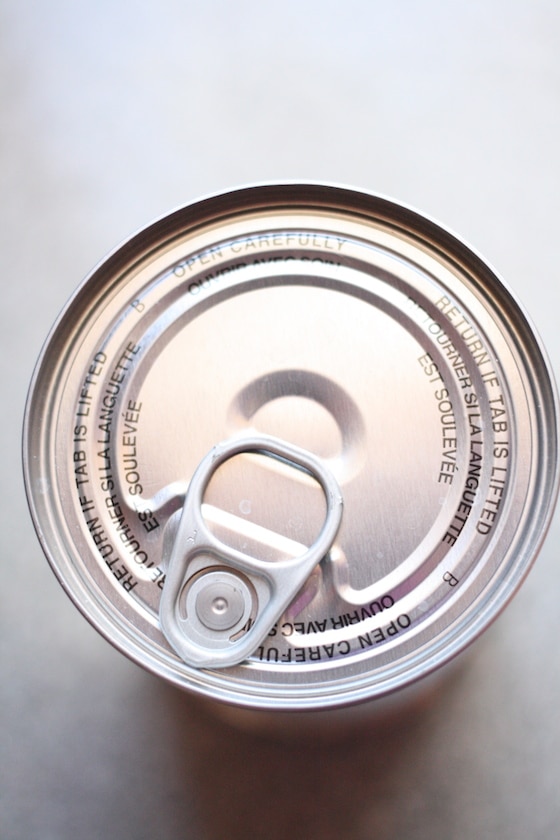
Start by removing your label from the can. I suppose you could leave it on, but I always remove it because I like the look of that shiny clean can when presenting my gift.
*A handy tip for removing stubborn labels is to blast it with the heat of your hair-dryer. The glue softens quickly, and your label will peel right off.
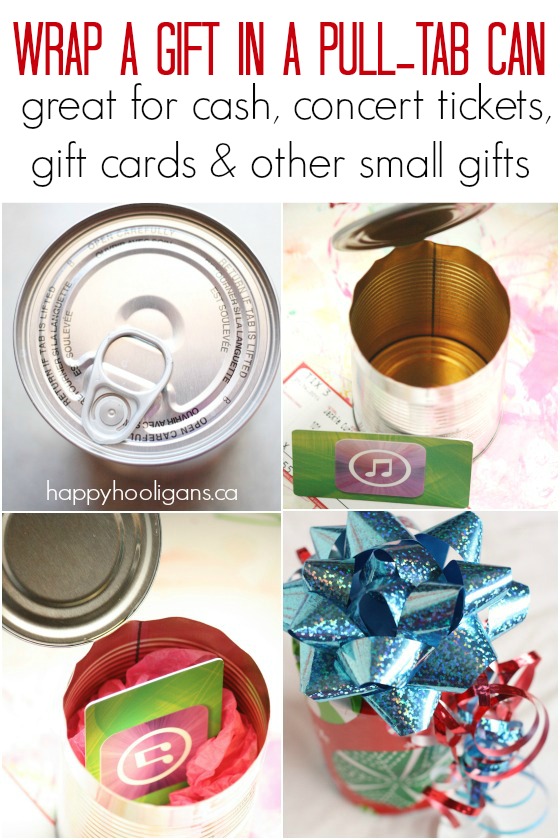
Wwith a can-opener, open the BOTTOM of the can. Do NOT open the top. You must leave the top of the can completely intact so your recipient has to “pop” the lid to reveal what’s inside. Leave the bottom of the can attached by a half inch or so.
Empty the contents and store for later use.
Wash and dry the can, and for the love of all things holy, take care to not cut yourself on the sharp edge.
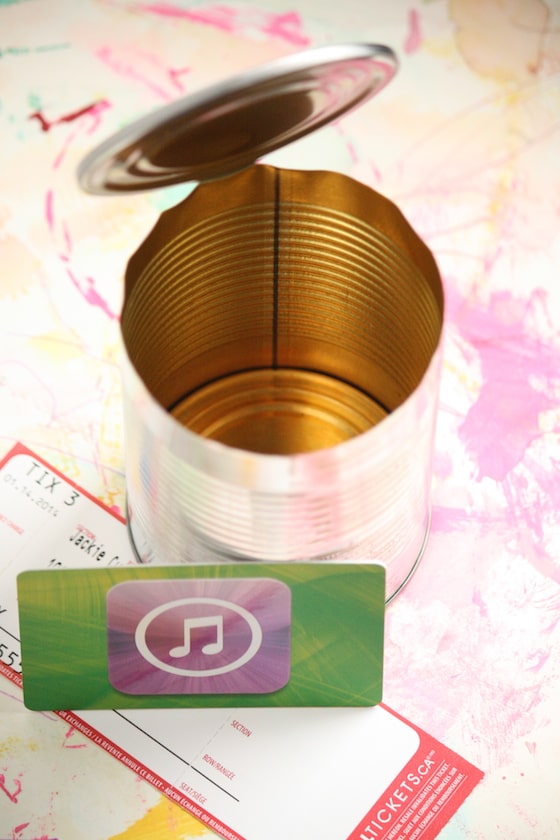
Now, pop your gift into the can, and stuff it with tissue or whatever fluffy filler you have on hand. I’ve used tissue paper here.
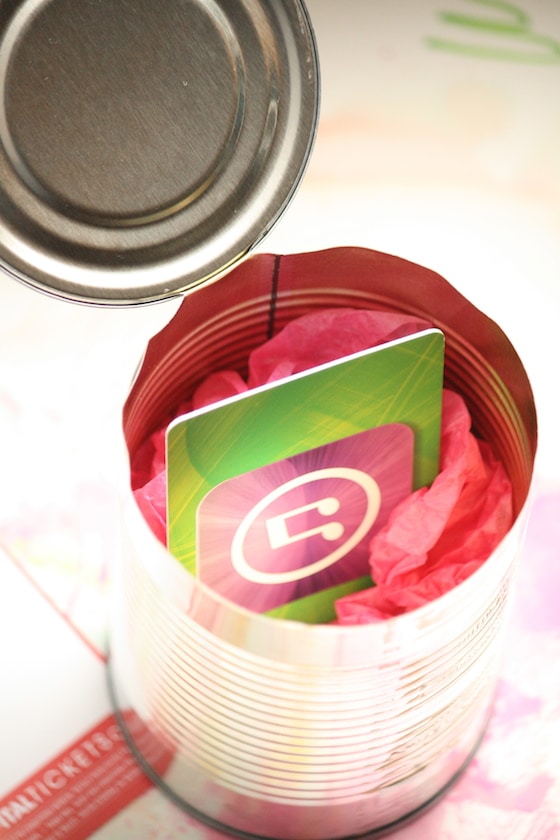
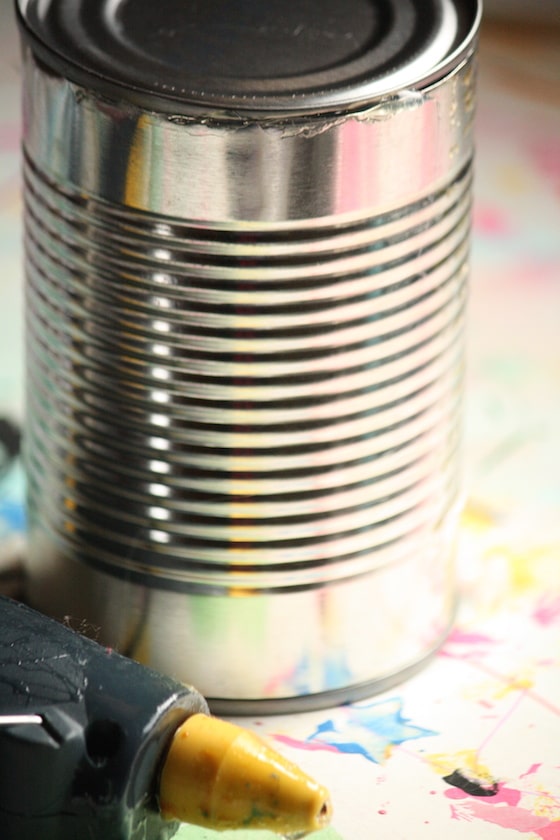
With a glue gun, re-attach the bottom of the can. Hold it all in place for a minute while the glue dries. The seal that you’ve created won’t look perfect, but that’s not going to matter.
See? Mine’s kind of messy. No worries.
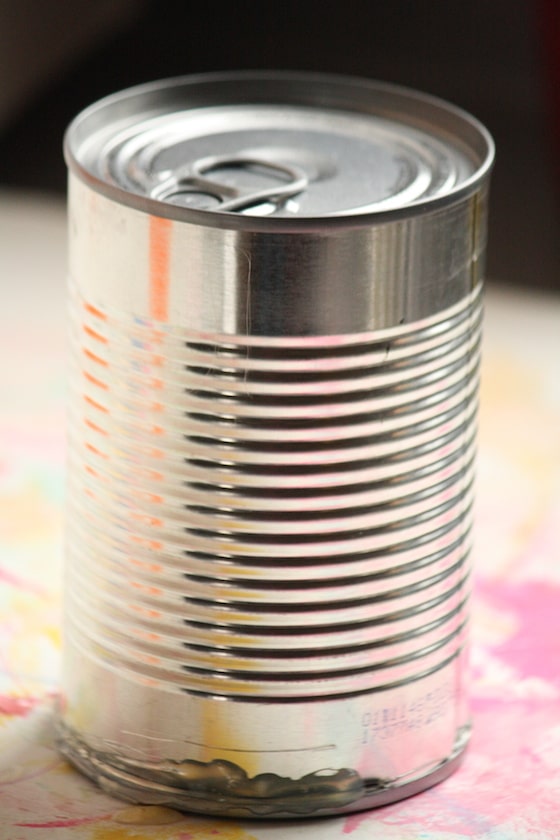
Now flip your can over, and ta-daaaa… You have what looks like a completely new, un-opened tin can! Cool or what?
Now you just have to glam it up with wrapping paper, ribbons and bows!
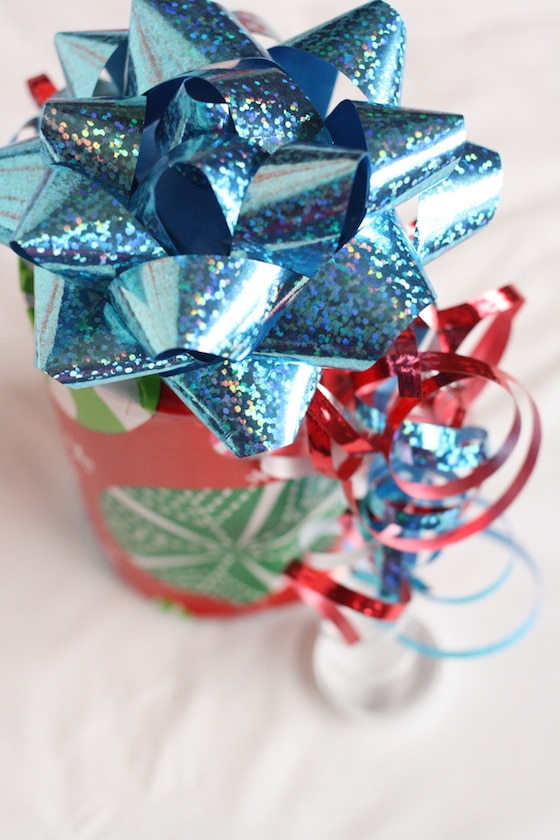
Doesn’t that look pretty? Ooooo! They’ll never guess what’s inside!
Here’s a shot taken the first time I used this method of gift-wrappnig. This is my dad and my boys opening tickets to a Jr. A hockey game one year at Christmas.

Isn’t that a fun and creative way to give a gift? Now go grab a can or two, and get wrapping!
Looking for more cool DIY gift-wrap ideas? Check out:
Gorgeous Brown Paper Bag Gift Wrap
Homemade Wrapping Paper with Coloured Ice Pops
How to Make Gift Wrap with Paint and a Hair Dryer
Follow the Hooligans on Facebook


Jackie is a mom, wife, home daycare provider, and the creative spirit behind Happy Hooligans. She specializes in kids’ crafts and activities, easy recipes, and parenting. She began blogging in 2011, and today, Happy Hooligans inspires more than 2 million parents, caregivers and Early Years Professionals all over the globe.


