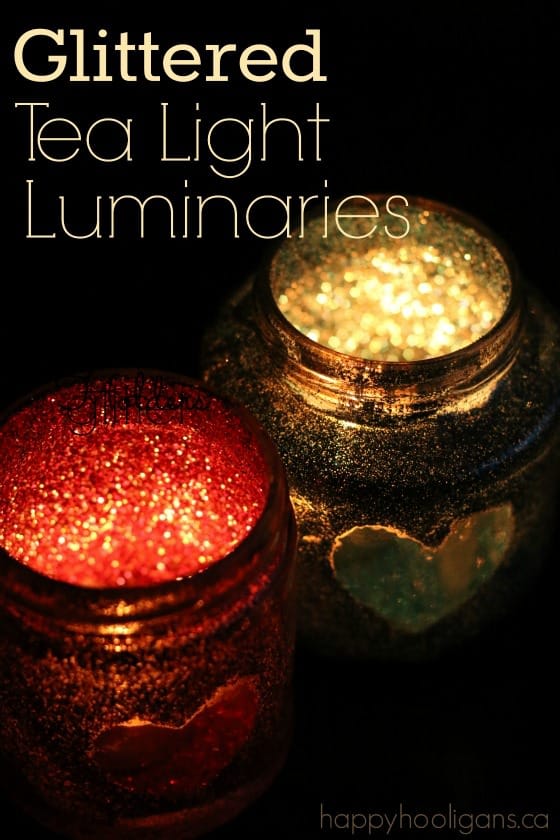
No-Mess Glittered Tea Light Luminaries

Check out the glittered Tea Light Luminaries we made for Valentines day! They’re gorgeous and sparkly, and they make a beautiful homemade gift for kids to give to someone special. The best news? The process is virtually mess-free!
I am so in love with our latest Valentine’s Day craft!
I love homemade luminaries. Remember our Valentines Votives and our Snowman luminaries?
Well, I’ve noticed glittered tea light luminaries popping up on Pinterest as Valentines approaches, and I so wanted to make some but I couldn’t handle the thought of glittering the outside of a glass jar.
I mean, the process would be a glitter nightmare for a glitterphobe like me, and I kept thinking that every time you touched the jar days and weeks later, there would be glitter everywhere.
I know I am not alone. Many of us, as crafty as we are, just can’t handle loose glitter.
However, I love the way glitter looks, and I can totally handle a glitter craft if the glitter is contained – meaning we’re not shaking it everywhere, and it won’t be tracked through the house for days to come.
And that’s why I’m so excited about our luminary craft today! I figured out a way to make a tea light luminary, WITH real glitter, without any of the mess!
The secret?
We glittered the INSIDE of the jar!
The process was a lot of fun, the results were gorgeous, and WOOHOO… not a speck of errant glitter anywhere when our luminaries were finished!
See all of our Valentines Crafts for 5-10 year olds here.
Let me show you how we made them!
For your Convenience, this post contains Amazon affiliate links.
To make our glittered Tea Light Luminaries, you’ll need:
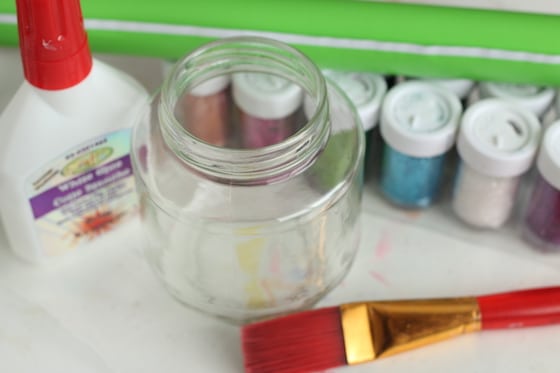
- glass jar with lid
- white glue
- glitter
- paintbrush
- Con-Tact Paper (one-sided sticky paper) for the heart cut-out
- battery operated tea light
Don’t mind that our contact paper is green. I was out of clear contact paper but it doesn’t matter. The contact paper is just a temporary part of the process.
To start, we washed and dried our glass jars to remove any possible residue that might interfere with our process.
Then, I cut a couple of small hearts out of the contact paper, and I stuck one inside each jar.
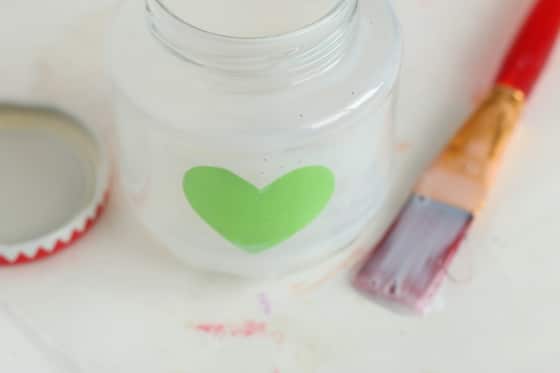
Next, with a paintbrush, the hooligans brushed a coat of glue all over the inside of the jars.
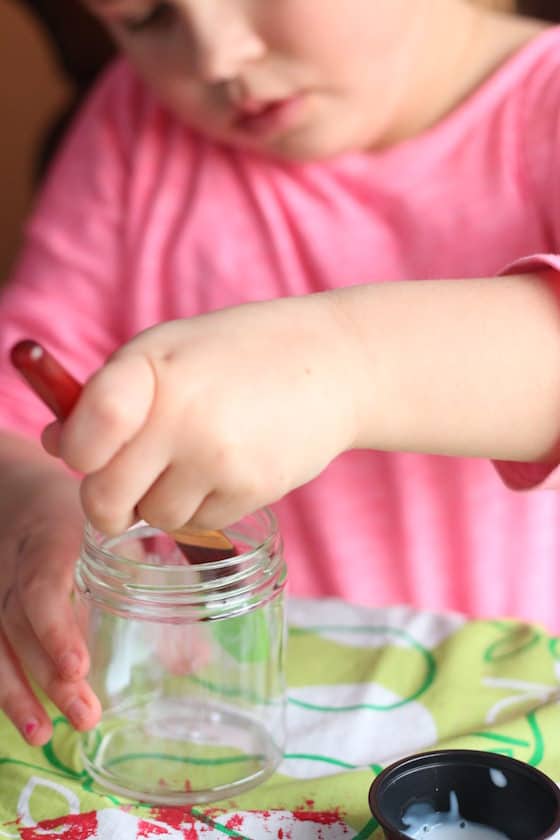
You want to make sure every bit of the jar is covered: bottom, sides and top, inner rim. When you get to the rim, if your jar has an angled edge like one of ours did, it can be tricky to angle your brush to get that part covered. I used my finger to swipe the glue around that angled bit.
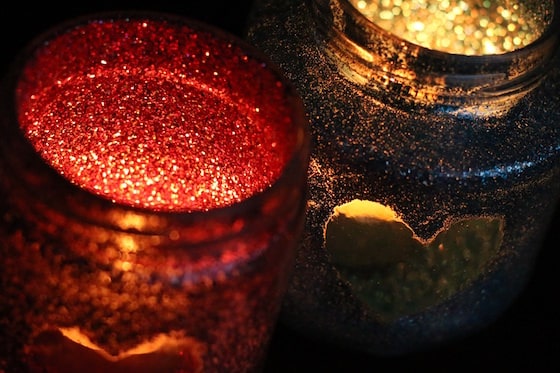
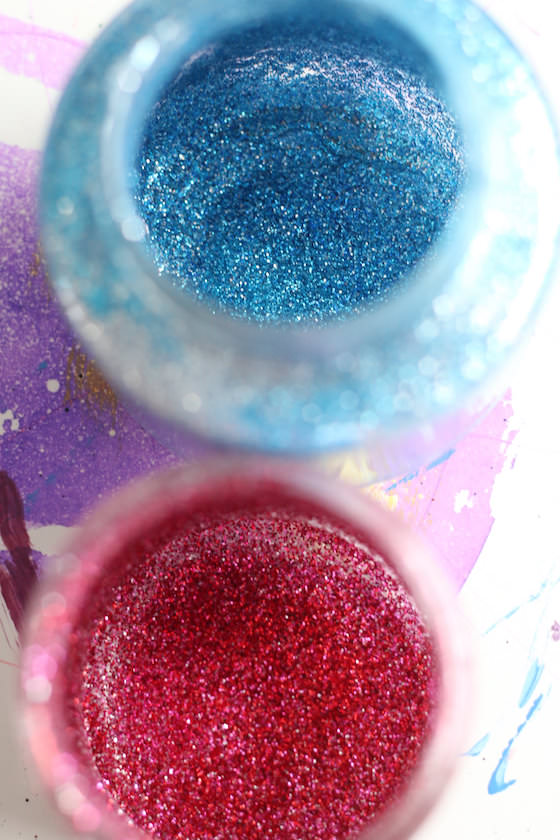
Next, the hooligans chose their glitter colours. One chose pink, red and white glitter for her jar, and the other hooligan chose turquoise, navy and silver for his.
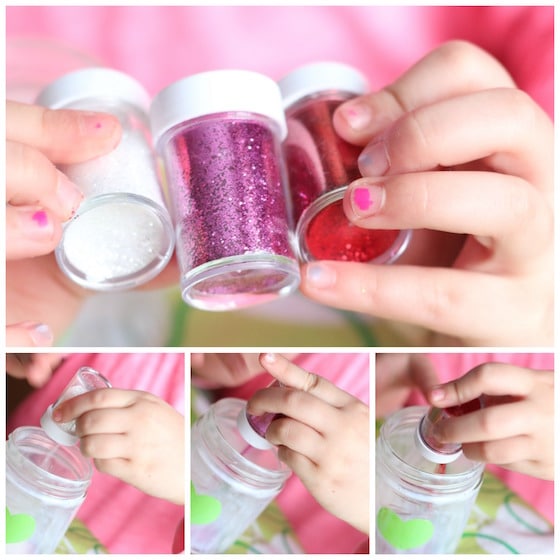
They poured their glitter, one colour at a time, into their jars. Be generous with your glitter to ensure there will be enough to cover the inside of your jar entirely.
Then we popped the lids on tightened them. For those of you who feel a little faint about the next step, you might want to double check that lid to make sure it’s on properly.
Now, it’s time to shake, shake, shake your jar!
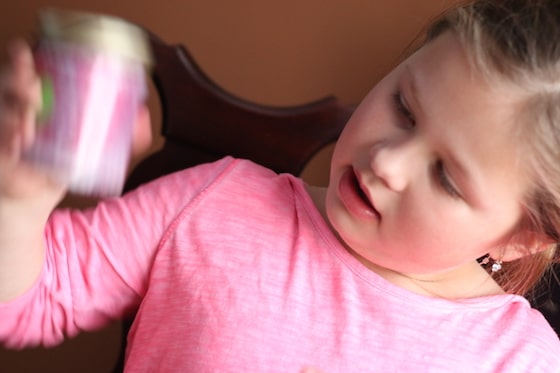
When we stopped shaking, we inspected our jars to make sure we had full glitter coverage, and then we removed the lids. There will be some glitter inside the lid. You can toss the lids in the garbage as you won’t be needing them them.
In one jar, there was some excess glitter which we tapped into the garbage. Our other jar didn’t have any excess at all in the bottom of it.
Now, it’s time to remove that contact paper heart. This can be a bit tricky.
I just stuck my finger into the jar, and gently pushed on the contact paper with my fingernail until I’d loosened it enough that I could peel it away from the glass.
Try not to disturb any surrounding glitter while you do this. If you do, you can nudge it back into place while the glue is still wet.
Let your jars sit for a couple of hours until the glue has completely dried.
When the glue is dry, drop a battery operated tea light into the jar, and voila…
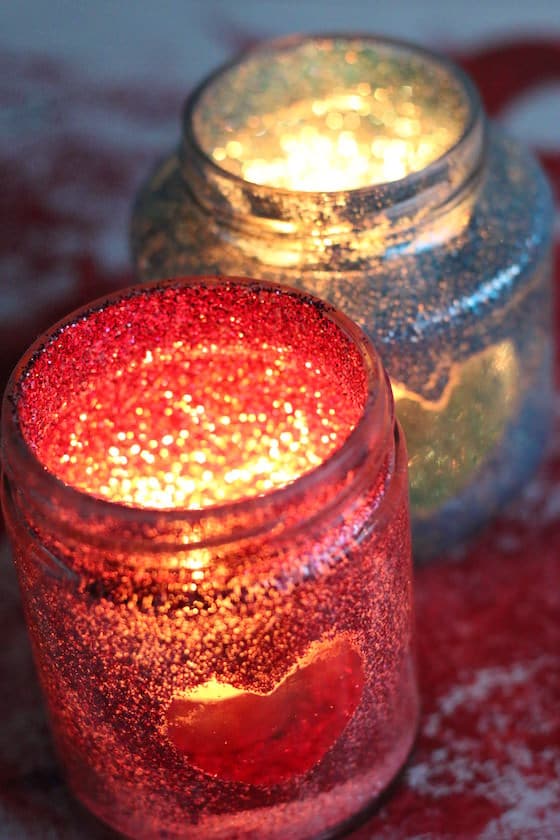
Aren’t they beautiful? I can’t get enough of them! They look lovely in the daylight, but oh my, they are stunning in a dark room with the candles glowing inside!
NOTE:
If you’d rather not use a real tea light, you can use a battery operated tea light to light up your luminary.
And if using a candle with a real flame, be certain to make sure your glitter is non-flammable. Of course, is always the case when burning candles, do not leave your candle unattended.
And there you have it! A gorgeous, glittery tea light luminary without any mess!
Happy Valentines Day!
If you liked this post, you may also enjoy:
Frosted Glass Jars
Stained Glass Jars with Sharpie Markers
50+ Ways to Use Baby Food Jars
5 Easy Valentines Crafts for Kids
Get the 3-5 Playful Preschool e-Book!
25+preschool activities by 25 bloggers, 10 printables, 50 links to activities not featured in the book all for $8.99!
Download your copy today:

Follow the Hooligans on Facebook, Pinterest and Twitter!

Jackie is a mom, wife, home daycare provider, and the creative spirit behind Happy Hooligans. She specializes in kids’ crafts and activities, easy recipes, and parenting. She began blogging in 2011, and today, Happy Hooligans inspires more than 2 million parents, caregivers and Early Years Professionals all over the globe.


