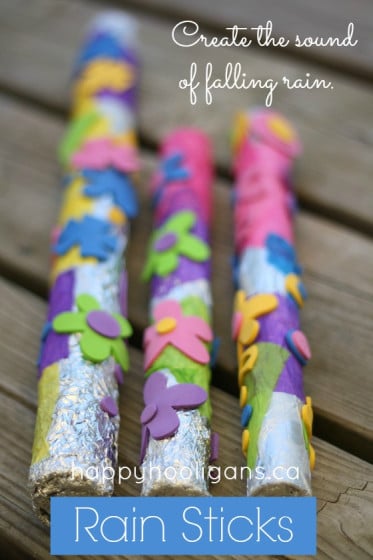
Rain Sticks for Kids to Make

How to make a rainstick with a cardboard roll and some basic materials. Pretty, easy and inexpensive! Ideal for toddlers and preschoolers.
You’ll find lots of super spring crafts for kids here, and today’s rain sticks are no exception! They’re easy to make, the kids loved decorating them, and they sound great! Before we get started though, you might be wondering…
What IS a rain stick?
Traditional rain sticks are instruments made with hollow cacti, thorns and lava pebbles, and are used in some cultures to invoke the rain spirits. Ours are simplified rain sticks, and I’m not sure how effective they’d be for calling up any spirits but they were fun to make, and they sound lovely when you up-end them.
When I say ours our “simplified”, I mean that we didn’t put nearly as many nails (or tacks) into them as we should have. Pop over to Planting Ideas to see how to make a real rainstick. It requires many more nails than what we used, which would slow the flow of the materials inside, producing a longer and gentler sound.
I think ours turned out just great for the hooligans though, and the process was easy, using materials we already had on hand.
P.S. If you’re looking for more cardboard roll crafts, you’ll find over 30 of our favourites here.
For your conviencience, this post contains affiliate links. As an Amazon associate, I earn from qualifying purchases.
To make our rain sticks, you’ll need:
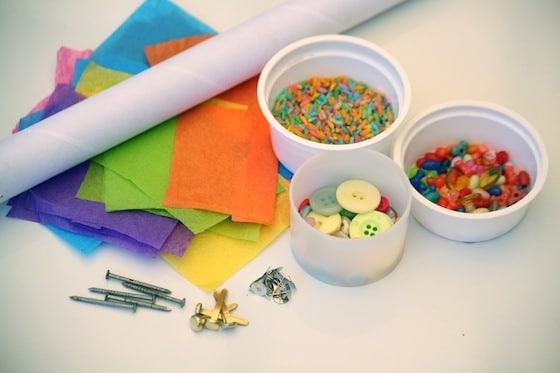
You could use a paper towel roll for this project, but food wrap tubes are more sturdy. We used cardboard rolls that had once held plastic wrap (i.e. Saran Wrap) and aluminum foil, and I also had a long, sturdy tube that a poster came packaged in.
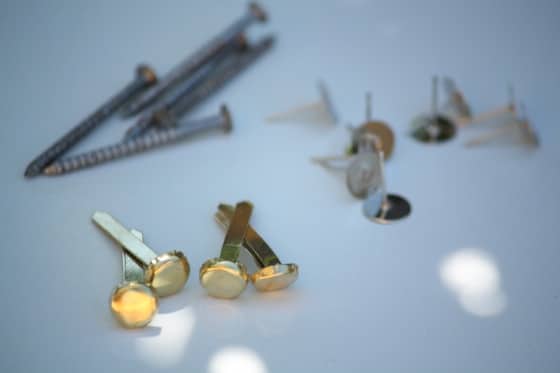
Because some of our tubes were too small in diameter to insert nails into, without them poking out the other side, I brainstormed up a couple of alternatives: thumb-tacks and brass-tacks.
How to make a rainstick:
Push, hammer or tap your tacks and nails into the tube. (I made small cuts with an exact-o knife to insert the brass-tacks).
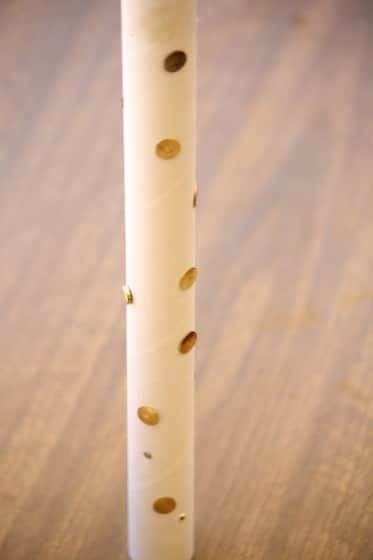
Once you have all of your nails and tacks in, (remember: more is better than less), roll your tube up in aluminum foil.
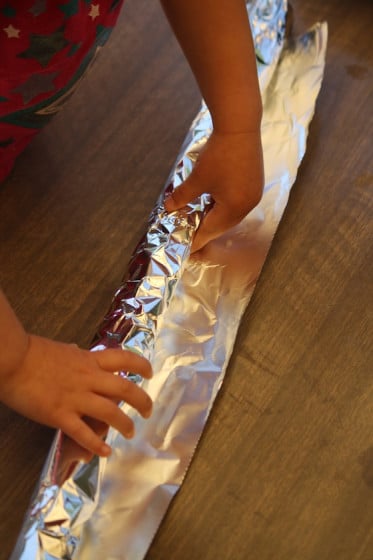
Squeeze the tin foil tightly around the tube and stuff the excess into one end of the tube to form a plug of sorts. (see finished photo at the bottom of this post).
Pour your filler items (beads/rice/small corn kernels etc.) into the open end of the tube. Keep your items small (rice is ideal) so they don’t get jammed between the nails and tacks. Now seal up the open end just like you sealed the bottom.
To decorate our rain sticks, we decoupaged them with tissue paper and watered down white glue.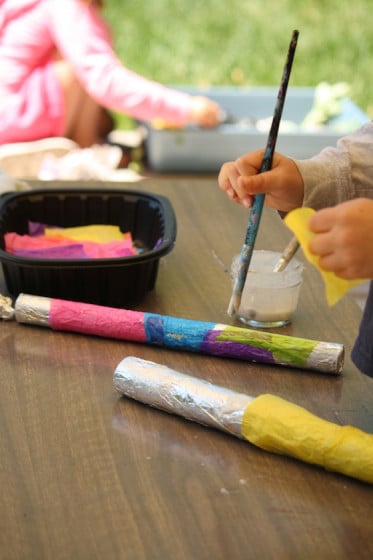
When they were dry, we decorated our rain sticks craft-foam stickers. The hooligans love these things because, well, what kid doesn’t love a sticker? And I love them because peeling the backs off the stickers gives little fingers a real fine-motor work out.
When you’re finished decorating your rain stick, tip it end-over-end. The rice sounds like the soft pitter patter of raindrops as it cascades through the tube. 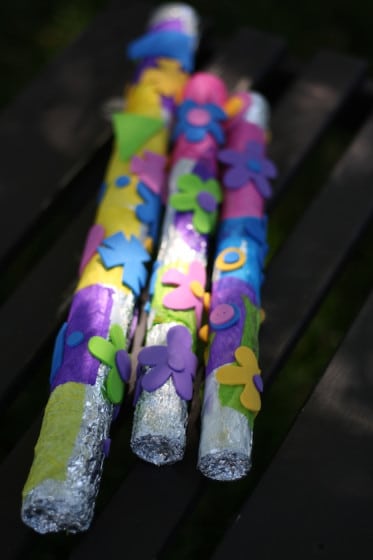
More Spring Crafts for Preschoolers:
8 Gorgeous Homemade Wind Chimes for Kids to Make
Pringles Can Windsock Craft
Styro-framed art
rainbow collages
Paper Plate Birds

Jackie is a mom, wife, home daycare provider, and the creative spirit behind Happy Hooligans. She specializes in kids’ crafts and activities, easy recipes, and parenting. She began blogging in 2011, and today, Happy Hooligans inspires more than 2 million parents, caregivers and Early Years Professionals all over the globe.


