Straw Weaving (Weaving on Drinking Straws)
")
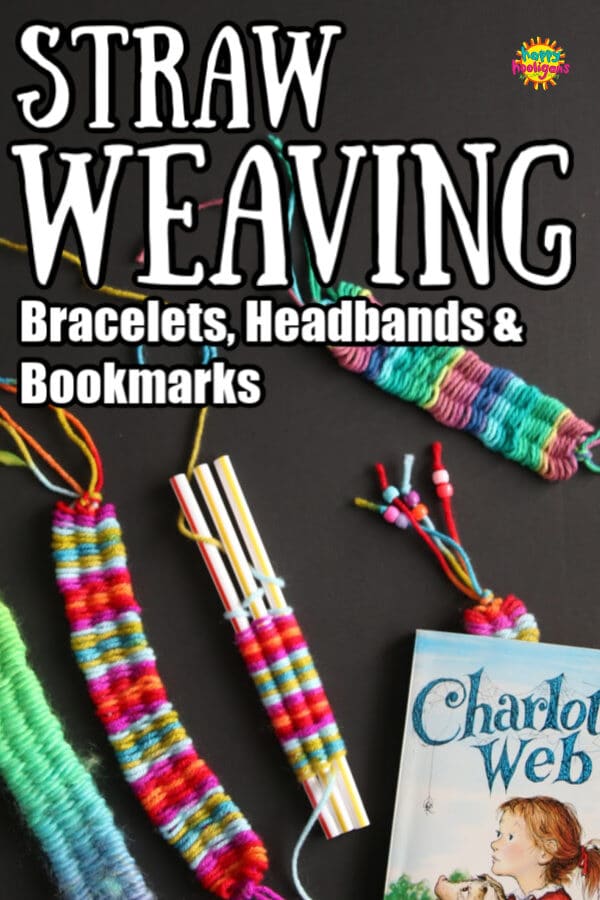
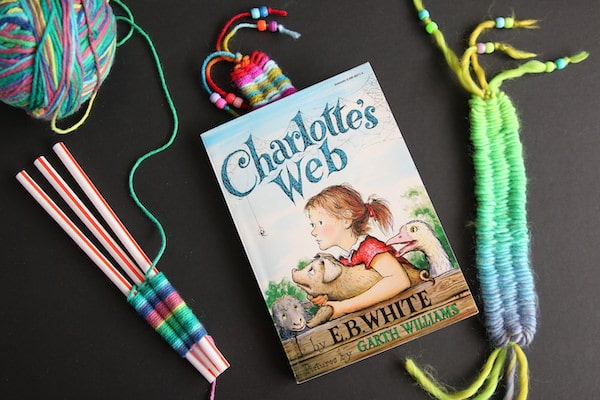
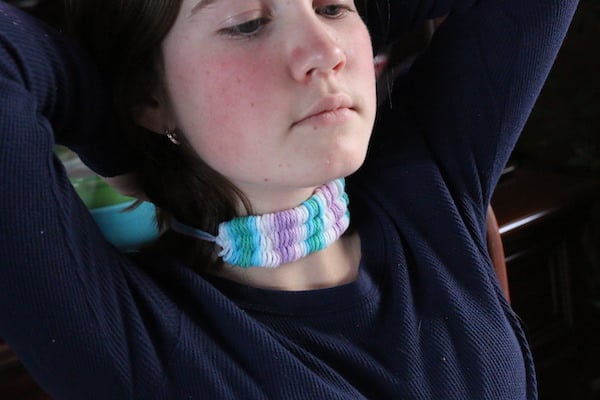
Here’s another cool weaving craft for your older kids to try. Straw Weaving! All you need is a few drinking straws, tape and yarn, and your kids can make bracelets, necklaces, headbands and bookmarks for themselves or to trade with friends.
As you know, my daycare hooligans love yarn crafts, and they’re really into weaving right now (see all of our weaving projects here). The other day we made these these woven paper plate bowls, and most recently, we tried straw weaving!
Oh my goodness. It couldn’t be any easier, and the pieces make up really quickly, so your kids can make quite a few projects in no time.
I love that there’s no special equipment involved with straw weaving. You don’t need a sewing needle, and there’s no loom to prepare other than taping your straws together.
Let me show you how easy it is to do.
You can watch the instructional video that I’ve made or follow the written instructions below.
How-To Video:
Straw Weaving Instructions:
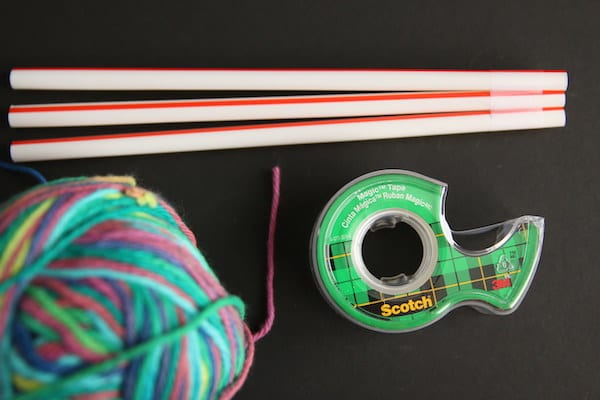
Supplies:
- 3 or more drinking straws
- yarn (approx 7-8 meters)
- tape
- scissors
- beads (optional)
Time needed: 30 minutes
How to Weave with Drinking Straws and Yarn
- Tape straws.
Tape 3 drinking straws together at one end, leaving a very small gap between the straws.
- Weave.
To weave on your straws, leave a long tail, and insert your yarn between two of the straws, close to the taped end. Weave over and under the straws until you get to the 3rd straw and then weave your way back to the first straw. Repeat this motion as you weave your way up the straws.
Note: From time to time, stop and slide your weaving down towards the taped end so your stitches are snug. Weave all the way to the top end of the straws.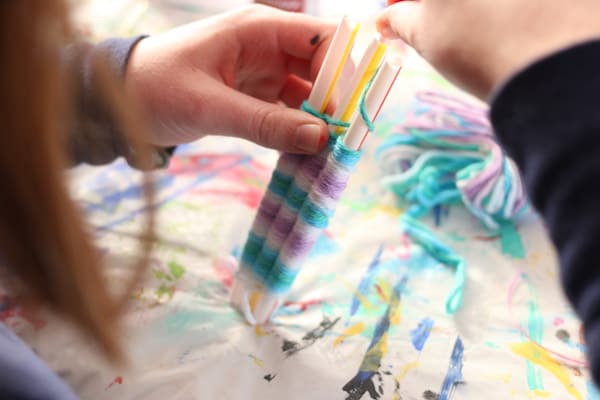
- Prepare to take project off the straws.
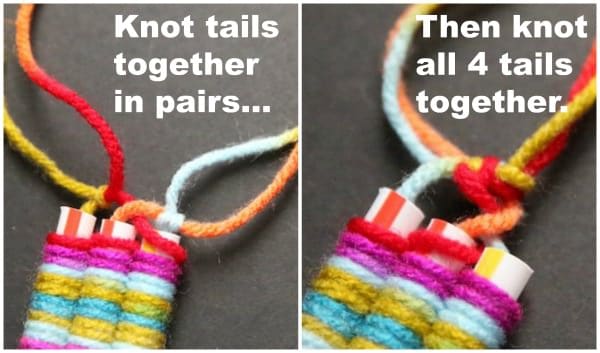
When you get to the end of the straws, snip your yarn, leaving a tail.
Cut 3 new pieces of yarn that are several inches longer than the straws and drop one piece through each straw.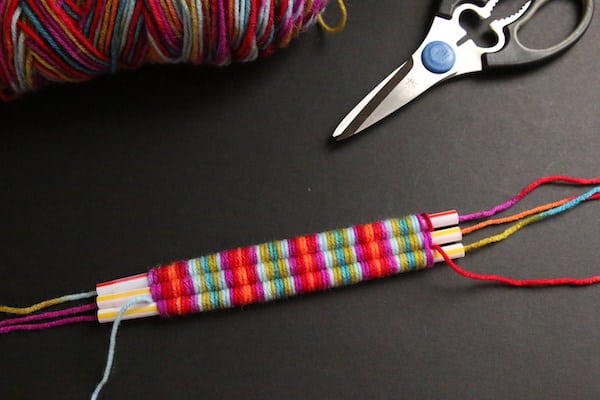
- Tie the top tails.
At the top (untaped) end of the straw, tie the piece that you finished weaving with to one of the new pieces of yarn and secure with a knot. Next, knot the other two pieces of yarn together. Then knot all 4 tails together in one knot.
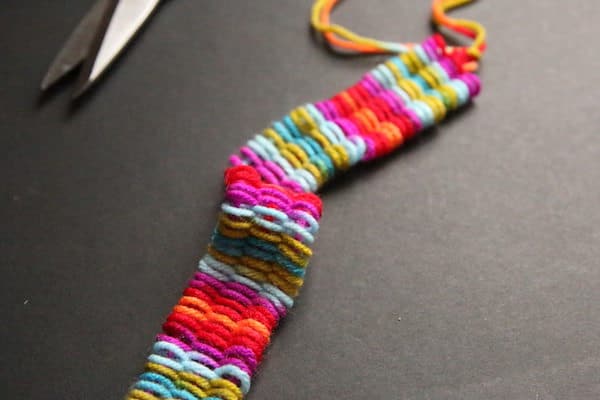
- Slide project off straws.
Gently push and shimmy your weaving off the straws. Lay your project flat and gently smooth it out.
- Tie the bottom tails.
Much like you did with the top tails, knot the bottom tails together.
- Decorate with beads.
If you’re making a bookmark, add some pony beads to the tails of your woven project.
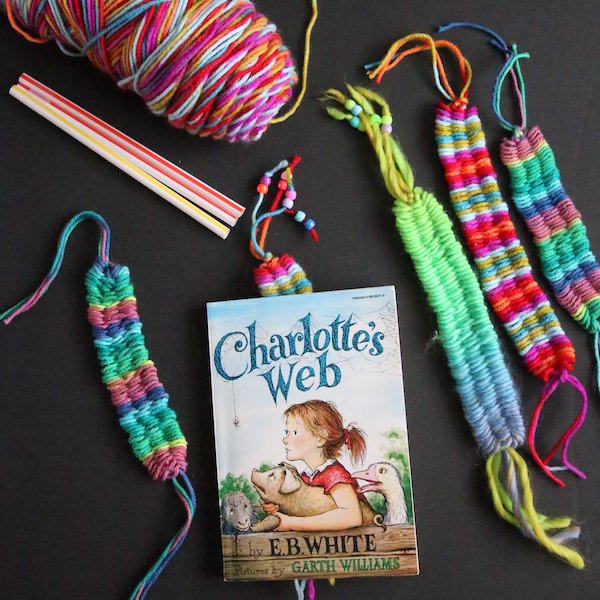
And that, my Lovely, is all there is to weaving on straws.
What a fun way for older kids to enjoy an afternoon of crafting.
You may also like:
Get the 3-5 Playful Preschool e-Book!
25+ Preschool activities by 25 bloggers, 10 printables, PLUS 50 links to activities not featured in the book.
Click here to download your copy today

Follow the Hooligans on Facebook!

Jackie is a mom, wife, home daycare provider, and the creative spirit behind Happy Hooligans. She specializes in kids’ crafts and activities, easy recipes, and parenting. She began blogging in 2011, and today, Happy Hooligans inspires more than 2 million parents, caregivers and Early Years Professionals all over the globe.


